Troubleshoot Common Printer Problems: A Step-by-Step Guide
Troubleshooting common printer problems involves a systematic approach, starting with basic checks like power and connectivity, followed by addressing paper jams, ink or toner issues, and driver problems to ensure smooth printing at home.
Experiencing printer problems at home? Don’t worry; you’re not alone. This step-by-step guide will walk you through how to troubleshoot common printer problems, helping you get back to printing documents and photos in no time.
Understanding Common Printer Problems
Printers, invaluable tools for both work and leisure, can sometimes be frustrating when they malfunction. It’s essential to first understand the types of issues you might encounter. Recognizing these will enable a faster, more effective troubleshooting process.
Connectivity Issues
One of the most common setbacks is a printer not connecting to your computer or network. This could be due to a faulty USB cable, Wi-Fi connectivity problems, or outdated drivers. Ensuring a stable connection is crucial before diving into more complex solutions.
Paper Jams
Almost everyone has experienced the dreaded paper jam. These occur when paper gets stuck inside the printer, either due to misaligned paper loading, using the wrong type of paper, or the printer’s rollers being worn out.
- Ensure Correct Paper Alignment: Load paper carefully within the tray guides.
- Use the Correct Paper Type: Always use paper that meets the printer’s specifications.
- Clean or Replace Rollers: Over time, rollers can wear out or become dusty, leading to jams.
Ink or Toner Problems
Problems related to ink or toner can range from low ink levels to cartridges that are not recognized. Sometimes, even after replacing cartridges, error messages persist, indicating a deeper issue within the printer’s system.
Driver Problems
Outdated or corrupt printer drivers are a frequent cause of printing problems. Drivers act as the communication bridge between your computer and printer. Issues with these can lead to printers not functioning correctly.
Understanding the root cause is half the battle. By identifying the common types of problems beforehand, you’re better equipped to handle them efficiently. In the next sections, we’ll explore specific troubleshooting steps for each of these issues.
Basic Troubleshooting Steps
Before getting into complex solutions, it’s essential to run through a few basic troubleshooting steps. These simple checks often resolve many common printer issues quickly and efficiently.
Check the Power and Connections
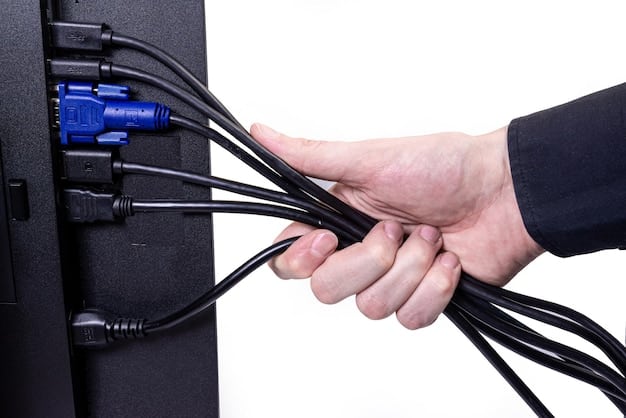
Begin by confirming that your printer is indeed powered on and properly connected. Ensure that the power cable is securely plugged into both the printer and the wall outlet. If you’re using a USB cable, check that it’s firmly connected to both the printer and your computer.
Restart Your Printer and Computer
A simple restart can resolve numerous technical glitches. Power off your printer, wait a few minutes, then turn it back on. Similarly, restart your computer to refresh the system and resolve any temporary software conflicts.
Check for Error Messages on the Printer Display
Printers often display error messages that can provide valuable clues about the problem. Look for any messages on the printer’s LCD screen and consult the printer’s manual or the manufacturer’s website to understand what the error code means.
- Interpret Error Codes: Use the printer manual to decode error messages.
- Online Resources: Search the error code online for community solutions.
- Contact Support: If the error continues, contacting support may be required.
These basic steps are quick to perform and can often save you time and effort. Always start here before moving on to more advanced troubleshooting techniques. Next, we will discuss how to tackle paper jam issues specifically.
How to Clear a Paper Jam
Paper jams are arguably one of the most frustrating and frequent printer problems. Clearing them efficiently and safely is crucial to maintaining your printer’s performance and longevity.
Turn Off the Printer
Before you start, turn off the printer and unplug it from the power source. This ensures your safety and prevents any electrical accidents while you’re reaching inside the machine.
Open the Printer’s Access Panels
Locate the access panels, usually at the back or front of the printer. Open these panels to expose the path where the paper travels. Consult your printer’s manual if you’re unsure where these panels are.
Gently Remove the Jammed Paper
Carefully pull out the jammed paper, using both hands to grip it evenly. Avoid tearing the paper, as small pieces left inside can cause further problems. Pull the paper in the direction of the normal paper path to minimize resistance.
- Use Both Hands: Distribute pressure evenly to prevent tearing.
- Follow Paper Path: Pull in the direction the paper is meant to travel.
- Check for Fragments: Ensure that no small pieces of paper are left behind.
Close the Panels and Restart
Once you’ve removed all the paper, close all access panels securely. Plug the printer back in and turn it on. Try printing a test page to ensure the issue is resolved and the printer is functioning correctly.
Clearing paper jams can be a bit messy, but with patience and care, it’s manageable. In the following section, we’ll discuss troubleshooting issues related to ink and toner.
Troubleshooting Ink and Toner Issues
Problems with ink or toner are very common, whether it’s about low ink levels, unrecognized cartridges, or poor print quality. Here’s how to tackle these typical challenges to improve your printer’s performance.

Check Ink or Toner Levels
Start by checking the ink or toner levels. Most printers have a software utility or display panel that allows you to see how much ink or toner remains in each cartridge. Low levels can lead to faded or incomplete prints.
Replace Empty or Low Cartridges
If any cartridges are empty or running low, replace them with new ones. Make sure to use cartridges that are compatible with your printer model. Using the wrong type can cause damage or printing errors.
Clean the Print Heads
Print heads can sometimes get clogged with dried ink, especially if the printer hasn’t been used for a while. Most printers have a built-in cleaning function that you can access through the printer’s settings or software.
- Run Cleaning Cycles: Use the printer’s built-in cleaning utility.
- Manual Cleaning: If necessary, clean the print heads manually with a lint-free cloth and isopropyl alcohol.
- Avoid Over-Cleaning: Excess cleaning can waste ink and potentially damage the print heads.
Reset the Printer
Sometimes, the printer may not recognize new cartridges immediately. Resetting the printer can help it recognize the new cartridges and clear any error messages.
Ink and toner issues can be frustrating, but with these steps, you can usually resolve them quickly. Next, let’s delve into tackling printer driver problems.
Fixing Printer Driver Problems
Printer drivers are critical for your computer to communicate effectively with your printer. When these drivers are outdated, corrupt, or incompatible, it can lead to various printing problems. Here’s how to address these issues.
Update Printer Drivers
Outdated drivers are a common cause of printer problems. Visit the printer manufacturer’s website and download the latest drivers for your specific printer model and operating system.
Reinstall Printer Drivers
If updating doesn’t resolve the issue, try reinstalling the printer drivers. First, uninstall the current drivers through the Device Manager on your computer, then reinstall the latest drivers you downloaded.
Check Driver Compatibility
Ensure that the drivers you are using are compatible with your operating system. Using the wrong drivers can lead to printing errors and other compatibility issues.
- Visit Manufacturer’s Website: Always download drivers from the official manufacturer’s site.
- Check OS Compatibility: Verify the driver is compatible with your operating system version.
- Use Device Manager: Manage and update drivers through the Device Manager.
Run the Printer Troubleshooter
Windows and other operating systems have built-in printer troubleshooters that can automatically detect and fix common driver-related issues. Run this tool to see if it can resolve your problem.
Keeping your printer drivers up to date is essential for smooth printing. In our final section, we’ll discuss wireless connectivity issues and how to resolve them.
Resolving Wireless Connectivity Issues
Many modern printers connect wirelessly, offering convenience but also introducing potential connectivity problems. Here’s how to troubleshoot wireless issues to ensure your printer stays connected.
Check Wi-Fi Connection
First, make sure that your printer is connected to your Wi-Fi network. Check the printer’s display panel for the Wi-Fi status. If it’s not connected, follow the printer’s instructions to connect it to your network.
Restart Your Router and Printer
Restarting your router and printer can often resolve connectivity issues. Power off both devices, wait a few minutes, then turn them back on. This can refresh the network connection and resolve any temporary glitches.
Update Printer Firmware
Outdated firmware can cause connectivity problems. Check the printer manufacturer’s website for firmware updates and follow the instructions to update your printer’s firmware.
- Check Printer’s Display: Look for Wi-Fi status and settings.
- Router Placement: Ensure the printer is within range of the Wi-Fi router.
- Firmware Updates: Keep the printer firmware updated for best performance.
Reinstall the Printer on Your Network
If the printer is still not connecting, try removing it from your network and reinstalling it. This can help re-establish the connection and resolve any configuration issues.
Wireless connectivity is essential for modern printing convenience. By following these steps, you can typically resolve most wireless issues. This complete guide should equip you with the knowledge to tackle common printer problems and keep your printer running smoothly.
| Key Point | Brief Description |
|---|---|
| 🔌 Power & Connection | Ensure the printer is powered on and properly connected to your computer or network. |
| 📄 Paper Jams | Carefully remove any jammed paper, making sure no fragments are left behind. |
| 🖨️ Ink/Toner | Check ink or toner levels and replace any empty or low cartridges. |
| drivers & Updates | Update or reinstall printer drivers to ensure compatibility with your computer. |
Frequently Asked Questions
▼
Several factors could be at play: check if the printer is turned on, properly connected, has sufficient ink or toner, and ensure there are no paper jams. Also, make sure the correct printer is selected as the default.
▼
Turn off the printer, open the access panels, and gently remove the jammed paper in the direction of the paper path. Ensure all fragments are removed to prevent future issues. Close all panels and restart.
▼
Faded prints often indicate low ink or toner levels. Check the cartridge levels and replace as needed. Also, run a print head cleaning cycle to clear any clogs that might be affecting print quality.
▼
Visit the printer manufacturer’s website and download the latest drivers for your printer model and operating system. Alternatively, you can use the Device Manager on your computer to update drivers automatically.
▼
Ensure the printer is connected to your Wi-Fi network and that the router is functioning correctly. Restart both the printer and the router. If problems persist, reinstall the printer on your network for a fresh connection.
Conclusion
By following this step-by-step guide, you should be well-equipped to troubleshoot and resolve most common printer problems you encounter at home. Remember to approach each issue systematically, starting with the basics and moving to more advanced solutions as needed, to keep your printer functioning smoothly.
