Configure Dynamic DNS (DDNS) for Remote Home Network Access

Configuring a Dynamic DNS (DDNS) service enables you to remotely access your home network by mapping a static hostname to your dynamically changing IP address, ensuring consistent access to your devices and services from anywhere.
Want to access your home network remotely, but your IP address keeps changing? This guide will show you how to configure a Dynamic DNS (DDNS) service, allowing you to easily connect to your home network from anywhere, anytime.
What is Dynamic DNS (DDNS) and Why Do You Need It?
Dynamic DNS, or DDNS, is a service that automatically updates a DNS server with the real-time IP address of a device in a network. But why is this important, and why might you need it?
Most home internet connections use dynamic IP addresses assigned by your Internet Service Provider (ISP). These addresses can change periodically, making it difficult to access services on your home network remotely because you can’t rely on a static IP address.
The Problem with Dynamic IP Addresses
Dynamic IP addresses pose a challenge for remote access. Imagine you want to access your home security camera while you’re away. If your IP address has changed since the last time you accessed it, you won’t be able to connect using the old address.
This is where DDNS comes in. It provides a consistent hostname that always points to your current IP address, even when it changes. This means you only need to remember the hostname, not the ever-changing IP address.
- Consistent Access: DDNS ensures you always have a reliable way to connect to your home network, regardless of IP address changes.
- Easy to Remember: Instead of remembering a long, changing IP address, you only need to remember a simple hostname.
- Remote Monitoring: Access your security cameras, smart home devices, and personal files from anywhere in the world.
In short, DDNS bridges the gap between dynamic IP addresses and the need for reliable remote access. It’s a simple yet powerful solution to stay connected to your home network.
Choosing a DDNS Provider
Selecting the right DDNS provider is the first step in setting up your service. There are several reputable providers to choose from, each with its own set of features and pricing.
When choosing a provider, consider factors such as ease of use, reliability, the number of hostnames offered (if you need more than one), and cost. Some providers offer free basic services, while others require a subscription for more advanced features.
Popular DDNS Providers
Here are a few popular DDNS providers:
- No-IP: Offers both free and paid plans with dynamic DNS, static DNS, and managed DNS services.
- DynDNS: A well-established provider with a robust infrastructure, offering reliable DDNS services for personal and business use.
- DuckDNS: A free DDNS service built on the Duck.sh platform, providing a simple and open-source solution.
- Cloudflare: While primarily a CDN, Cloudflare also offers DDNS functionality through its API, allowing you to manage your DNS records dynamically.
Before committing to a provider, take advantage of free trials or free tiers to test their service and ensure it meets your needs. Pay attention to user reviews and support resources to gauge the provider’s reliability and customer service.

Setting Up Your DDNS Account
Once you’ve chosen a DDNS provider, the next step is to create an account and configure your hostname. This process typically involves signing up on the provider’s website and selecting a unique hostname.
Most providers offer a range of domain extensions (e.g., yourname.ddns.net, yourname.no-ip.com). Choose an extension that is easy to remember and reflects your personal or business brand.
Steps to Create a DDNS Account:
- Visit the website of your chosen DDNS provider.
- Create an account by providing your email address and setting a password.
- Select a hostname and domain extension. Check if the hostname is available.
- Activate your account by verifying your email address (if required).
- Log in to your account and configure your DDNS settings.
During the configuration process, you may need to provide the current IP address of your home network. You can easily find this by searching “what is my IP” on Google. The DDNS service will use this initial IP address to associate with your hostname.
Creating a DDNS account is a straightforward process that sets the stage for reliable remote access. A carefully chosen hostname will become your gateway to accessing your home network from anywhere.
Configuring Your Router for DDNS
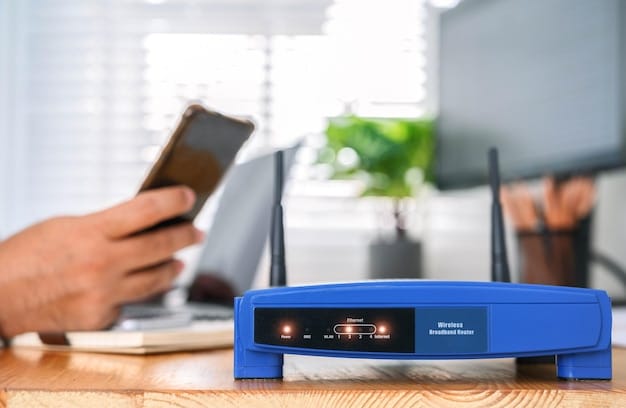
To ensure your DDNS hostname is always up-to-date, you need to configure your router to automatically update the DDNS service whenever your IP address changes. This is usually done through the router’s web interface.
Most modern routers have built-in support for popular DDNS providers. You’ll need to enter your DDNS account credentials (usually your username and password) and the hostname you created earlier.
Accessing Your Router’s Settings
To access your router’s settings, you’ll need to know its IP address. This is often the default gateway address. Here’s how to find it:
- Windows: Open Command Prompt, type `ipconfig`, and look for “Default Gateway.”
- macOS: Open Terminal, type `netstat -nr | grep default`, and look for the IP address next to “default.”
Once you have the router’s IP address, enter it into your web browser’s address bar. You’ll be prompted to enter your router’s username and password. If you haven’t changed them, check your router’s manual for the default credentials.
Steps to Configure DDNS in Your Router:
- Log in to your router’s web interface.
- Navigate to the DDNS settings (usually found in the “Advanced” or “WAN” settings).
- Select your DDNS provider from the list.
- Enter your DDNS username, password, and hostname.
- Save the settings and enable DDNS.
After saving the settings, your router will automatically update your DDNS hostname whenever your IP address changes. This ensures that your remote access remains uninterrupted.

Testing Your DDNS Setup
After configuring your router for DDNS, it’s important to test the setup to ensure it’s working correctly. This involves verifying that your hostname resolves to your current IP address and that you can access your home network remotely.
A simple way to test this is to use an online DNS lookup tool. Enter your DDNS hostname and check if the resolved IP address matches your current IP address. You can find your current IP address by searching “what is my IP” on Google.
Steps to Test Your DDNS Setup:
- Find your current public IP address using a website like whatismyip.com.
- Use an online DNS lookup tool (e.g., DNS Checker) to check the IP address associated with your DDNS hostname.
- Verify that the IP address from the DNS lookup matches your current public IP address.
- Try accessing your home network remotely using your DDNS hostname. For example, if you have a web server running on your home network, try accessing it using your hostname in a web browser.
If the IP addresses match and you can successfully access your home network remotely, your DDNS setup is working correctly. If not, double-check your router’s DDNS settings and ensure that your DDNS account is active.
By testing your DDNS setup, you can ensure that your remote access will be reliable and that you can always connect to your home network, no matter where you are.
Troubleshooting Common DDNS Issues
Like any technical setup, DDNS configurations can sometimes encounter issues. Here’s a look at some common problems and how to troubleshoot them:
Incorrect configuration, outdated router firmware, or issues with the DDNS provider can lead to connectivity problems. Diagnosing and resolving these issues promptly is crucial for maintaining continuous remote access.
Common DDNS Problems and Solutions
- Hostname Not Resolving: Ensure your router is correctly configured with the DDNS provider’s settings. Check your username, password, and hostname for typos.
- IP Address Not Updating: Update manually or reboot your router to ensure it’s sending IP updates to the DDNS provider regularly.
- Firewall Issues: Configure your firewall to allow incoming connections on the necessary ports, so DDNS can access your devices.
Additionally, make sure the DDNS service is active on your router and that the router’s firmware is up to date. Outdated firmware can sometimes cause compatibility issues with DDNS services. If problems persist, check the provider’s status page or contact their support team.
Addressing common issues promptly ensures that your DDNS setup remains efficient and reliable, giving you constant access to your home network.
| Key Point | Brief Description |
|---|---|
| 🌐 What is DDNS? | A service that keeps your hostname linked to your current IP address. |
| 🛠️ Router Setup | Configure your router to automatically update your DDNS settings. |
| ✔️ Testing is Key | Verify that your DDNS hostname resolves to your current IP address. |
| 💡 Troubleshooting | Check settings, update firmware, and ensure active DDNS service. |
Frequently Asked Questions (FAQ)
▼
DDNS allows you to access your home network remotely using a consistent hostname even if your IP address changes. This is essential for services like remote desktop, security cameras, and home servers.
▼
Consider factors like cost, reliability, ease of use, and the number of hostnames offered. Some providers offer free basic services, while others require a subscription for advanced features.
▼
If your router doesn’t directly support your DDNS provider, you might be able to use a DDNS update client on a computer within your network to keep the IP address updated.
▼
The frequency of IP address changes can vary depending on your ISP. Some ISPs may change your IP address every few days, while others may only change it every few months.
▼
DDNS itself is generally safe, but it’s essential to secure the services you access remotely. Use strong passwords, enable two-factor authentication, and keep your software up to date to protect against unauthorized access.
Conclusion
Configuring a Dynamic DNS (DDNS) service is a simple yet effective way to ensure reliable remote access to your home network. By following the steps outlined in this guide, you can easily set up DDNS and enjoy seamless access to your devices and services from anywhere in the world.


