Build Your Own Raspberry Pi Home Server: File Sharing & Media Streaming
A Raspberry Pi home server allows you to centralize file storage and media streaming, providing a cost-effective and customizable solution for accessing your data and entertainment from anywhere on your home network.
Ready to transform your Raspberry Pi into a versatile home server? This guide walks you through exactly how to build a Raspberry Pi home server for file sharing and media streaming, unlocking a world of possibilities for centralized storage and media enjoyment.
Why Build a Raspberry Pi Home Server?
A home server might sound intimidating, but with a Raspberry Pi, it’s surprisingly accessible. But why should you even consider building one?
Think of it as your personal cloud, offering a range of benefits from increased privacy to cost savings.
Centralized File Storage
Forget juggling files across multiple devices. A Raspberry Pi home server acts as a central hub for all your documents, photos, and videos.
Media Streaming Hub
Stream your favorite movies, TV shows, and music throughout your home with ease. No more relying on streaming services alone.
Privacy and Control
Take control of your data. Unlike commercial cloud services, you own and manage everything stored on your Raspberry Pi server.
- Cost-Effective: A Raspberry Pi and a hard drive cost significantly less than ongoing cloud storage subscriptions.
- Customizable: Tailor your server to your specific needs with a wide range of software and configurations.
- Educational: Building a home server is a fantastic learning experience in networking and Linux administration.
Beyond the core functionalities, a Raspberry Pi server can also be expanded to include features like a personal VPN, a web server, or even a smart home hub. The possibilities are endless.
Essential Hardware and Software
Before diving into the build, let’s gather the necessary components. Having everything ready ensures a smooth and efficient setup process.
Here’s a breakdown of the hardware and software you’ll need.
Hardware Requirements
These are the physical components necessary for assembling your Raspberry Pi home server.
Having the right components from the start avoids potential roadblocks later.
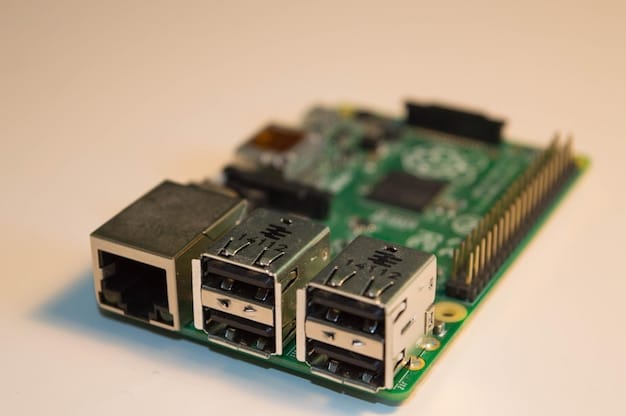
- Raspberry Pi 4: The recommended model for its processing power and Gigabit Ethernet.
- MicroSD Card (32GB or larger): For installing the operating system and storing system files.
- External Hard Drive: Choose a size that suits your storage needs.
- Ethernet Cable: Provides a stable and fast network connection.
- Power Supply: A reliable power supply is crucial for stable operation.
Software Requirements
The software you install dictates the functionality of your Raspberry Pi server.
These are the essential software components you’ll need.
- Raspberry Pi OS (formerly Raspbian): The recommended operating system.
- Samba: For file sharing across your network.
- Plex or Emby: For media streaming.
- Optional: SSH Client (PuTTY): For remote access to your server.
Choosing the right hardware and software is the foundation for a successful Raspberry Pi home server. Consider your specific needs and budget when making your selections.

Setting Up Raspberry Pi OS
With your hardware and software in hand, the first step is to install Raspberry Pi OS.
This provides the operating system foundation for your server and ensures everything runs smoothly.
Flashing the OS to the SD Card
The Raspberry Pi Imager is the easiest way to install the OS onto your SD card.
Download it from the official Raspberry Pi website and follow these steps:
- Insert the microSD card into your computer.
- Open the Raspberry Pi Imager.
- Select “Raspberry Pi OS (32-bit)”.
- Choose your SD card.
- Click “Write” and wait for the process to complete.
First Boot and Initial Configuration
Once the OS is flashed, insert the SD card into your Raspberry Pi and connect it to a monitor, keyboard, and mouse.
Power on the Pi and follow the on-screen prompts to:
- Set your country, language, and timezone.
- Connect to your Wi-Fi network (optional, Ethernet is recommended).
- Change the default password for the ‘pi’ user.
- Enable SSH for remote access (recommended).
Completing the initial configuration ensures your Pi is ready for the next steps in setting up your home server.
Configuring Samba for File Sharing
Samba allows you to share files between your Raspberry Pi and other devices on your network, such as Windows, macOS, and Linux computers.
This is crucial for accessing your stored files from any device in your home.
Installing Samba
Open a terminal window on your Raspberry Pi (either directly or via SSH) and enter the following command:
sudo apt update && sudo apt install samba samba-common-bin
Creating a Shared Directory
Choose a directory to share (e.g., /home/pi/shared) and set the appropriate permissions:
mkdir /home/pi/shared
sudo chmod -R 777 /home/pi/shared
Configuring Samba
Edit the Samba configuration file:
sudo nano /etc/samba/smb.conf
Add the following lines to the end of the file:
[shared]
comment = Shared Directory
path = /home/pi/shared
browseable = yes
writable = yes
guest ok = no
read only = no
Restart the Samba service:
sudo systemctl restart smbd
With Samba configured, you can now access the shared directory from other devices on your network. You’ll be prompted for the ‘pi’ user’s username and password.
Setting Up Plex for Media Streaming
Plex transforms your Raspberry Pi into a powerful media server, allowing you to stream your movies, TV shows, and music to any Plex-enabled device.
This provides a seamless and organized media experience throughout your home.
Installing Plex Media Server
Download the Plex Media Server package for Debian (ARMv7) from the Plex website.
Transfer the package to your Raspberry Pi and install it using the following command:
sudo dpkg -i plexmediaserver_*.deb
If there are dependency issues, run:
sudo apt -f install
Configuring Plex
Open a web browser and navigate to http://your_raspberry_pi_ip:32400/web.
Sign in to your Plex account and follow the on-screen prompts to:
- Name your Plex Media Server.
- Add media libraries by pointing Plex to the directories where your media files are stored.
- Customize your Plex settings.
Optimizing Plex Performance
Since the Raspberry Pi has limited processing power, consider these optimizations:
- Use direct play whenever possible to avoid transcoding.
- Optimize your media files for streaming.
- Limit the number of concurrent streams.
With Plex set up, you can now enjoy your media library on any device with the Plex app, including smart TVs, phones, tablets, and computers.
Securing Your Home Server
Security is paramount when running a home server, as it protects your data and network from unauthorized access.
Implementing these security measures minimizes the risk of potential threats.
Changing Default Passwords
Always change the default passwords for the ‘pi’ user and any other accounts you create.
Use strong, unique passwords for each account.
Enabling a Firewall
A firewall acts as a barrier, blocking unauthorized traffic to your server.
Enable the UFW firewall:
sudo apt install ufw
sudo ufw enable
Allow SSH access:
sudo ufw allow ssh
Allow Plex access:
sudo ufw allow 32400
Keeping Your System Updated
Regularly update your system to patch security vulnerabilities.
Run these commands:
sudo apt update && sudo apt upgrade
Implementing these security measures greatly enhances the safety of your Raspberry Pi home server and protects your valuable data.
| Key Point | Brief Description |
|---|---|
| 🛠️ Hardware Setup | Gather necessary components: Raspberry Pi, SD card, hard drive, etc. |
| 💾 OS Installation | Flash Raspberry Pi OS to the SD card and configure initial settings. |
| 📂 File Sharing (Samba) | Configure Samba to share files across your home network. |
| 📺 Media Streaming (Plex) | Set up Plex for streaming your media library to various devices. |
FAQ
▼
While possible, the Raspberry Pi 4 is recommended due to its enhanced processing power and gigabit Ethernet, resulting in a more responsive and efficient server experience compared to older models.
▼
It’s highly recommended. A static IP address ensures your server is always accessible at the same address on your network, simplifying configuration and preventing connection issues.
▼
Yes, by setting up port forwarding on your router and potentially using a dynamic DNS service. However, be mindful of security implications and take necessary precautions.
▼
You can connect multiple external hard drives to your Raspberry Pi. Consider using a USB hub if you run out of USB ports. You can also manage your files to ensure space.
▼
Absolutely! The Raspberry Pi’s versatility allows for advanced configurations, such as setting up VPNs, web servers, or even home automation systems, catering to experienced users.
Conclusion
Building a Raspberry Pi home server for file sharing and media streaming offers a rewarding and cost-effective way to manage your data and enjoy your media collection. With the steps outlined in this guide, you can transform a simple Raspberry Pi into a powerful and versatile home server tailored to your specific needs.


