Build Your Own Raspberry Pi Home Server: File Sharing & Streaming Guide

Setting up a Raspberry Pi home server for file sharing and media streaming is a cost-effective and efficient way to centralize your data, access it remotely, and enjoy your media library on any device within your network.
Want to centralize your files and stream media effortlessly? This comprehensive guide will show you how to build a Raspberry Pi home server, enabling you to share files and stream media seamlessly across your network.
Why Build a Raspberry Pi Home Server?
A Raspberry Pi home server offers a multitude of benefits for tech enthusiasts and casual users alike. It’s a versatile solution that combines affordability with functionality. Let’s dive into the reasons why you might want to embark on this DIY project.
Cost-Effectiveness
One of the most appealing aspects is the cost savings. Compared to purchasing a dedicated NAS (Network Attached Storage) device or cloud storage subscriptions, a Raspberry Pi home server can be set up for a fraction of the price.
Privacy and Control
With a Raspberry Pi server, you retain complete control over your data. Unlike cloud services where your data is stored on third-party servers, your files remain securely within your home network, under your direct management.
Customization and Flexibility
The Raspberry Pi offers unparalleled customization options. You can tailor the server to your specific needs, whether it’s file sharing, media streaming, home automation, or even running small web applications. The possibilities are virtually endless.
Here are some key advantages of a Raspberry Pi home server:
- Centralized Storage: Keep all your important files in one place, accessible from any device on your network.
- Media Streaming: Stream movies, music, and photos to your TVs, smartphones, and tablets.
- Remote Access: Access your files and media remotely, as if you were at home.
- Backup Solution: Use it as a backup server for your computers and mobile devices.
In conclusion, building a Raspberry Pi home server is an excellent way to take control of your data, save money, and enjoy a customized server experience. It’s a rewarding project that offers both practical benefits and a great learning opportunity.
Essential Components for Your Raspberry Pi Server
Before you start building your Raspberry Pi home server, it’s crucial to gather all the necessary components. Having everything prepared in advance will ensure a smooth and efficient setup process. Here’s a breakdown of the essential hardware and software you’ll need.
Hardware Requirements
First, let’s cover the hardware aspects. These are the physical components you will assemble to create the foundation of your server.
- Raspberry Pi Board: A Raspberry Pi 4 (or newer) with at least 4GB of RAM is recommended for optimal performance.
- MicroSD Card: A high-speed microSD card (32GB or larger) to install the operating system and store basic configuration files.
- External Hard Drive: A USB external hard drive for storing your files and media. The size will depend on your storage needs.
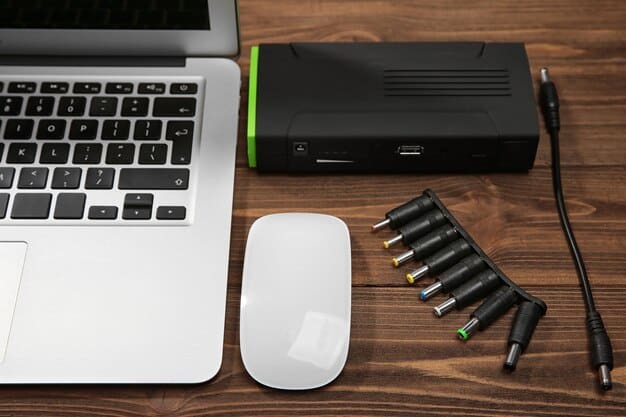
- Power Supply: A reliable power supply unit (PSU) that provides sufficient power to the Raspberry Pi and the external hard drive.
- Ethernet Cable: For a stable and fast network connection, an Ethernet cable is preferable to Wi-Fi.
- Case (Optional): A case to protect your Raspberry Pi board from dust and physical damage.
Software Requirements
Now, let’s move on to the software components. These are the programs and operating systems that will bring your server to life.
- Operating System: Raspberry Pi OS (formerly Raspbian) is the most popular choice, but Ubuntu Server is also a great option.
- File Sharing Software: Samba is commonly used for file sharing between Windows, macOS, and Linux devices.
- Media Streaming Software: Plex or Emby are excellent choices for streaming media to various devices.
- Remote Access Tools: SSH (Secure Shell) is essential for remote administration of the server.

Having these components on hand will allow you to proceed with the setup process without interruptions. Selecting the right hardware and software is a critical step towards building a functional and efficient Raspberry Pi home server.
Installing the Operating System
Installing the operating system is the first step in setting up your Raspberry Pi home server. The OS provides the foundation for all the subsequent software and services. Here’s how to install Raspberry Pi OS, the most commonly used OS for Raspberry Pi projects.
Downloading Raspberry Pi OS
First, you need to download the Raspberry Pi OS image from the official Raspberry Pi website. Choose the “Raspberry Pi OS (64-bit)” version for optimal performance. Alternatively, you can use the Raspberry Pi Imager tool, which simplifies the process.
Flashing the OS to the MicroSD Card
Next, you’ll need to flash the downloaded OS image to your microSD card. Using a tool like BalenaEtcher, select the OS image and your microSD card, then click “Flash” to write the OS image to the card.
Booting the Raspberry Pi
Once the flashing process is complete, insert the microSD card into your Raspberry Pi and connect the Ethernet cable, keyboard, mouse, and monitor. Finally, connect the power supply to boot up the Raspberry Pi for the first time.
Here are the steps in detail:
- Download Raspberry Pi OS from the official website.
- Use BalenaEtcher to flash the OS image to the microSD card.
- Insert the microSD card into the Raspberry Pi.
- Connect the necessary peripherals (Ethernet, keyboard, mouse, monitor).
- Connect the power supply to boot up the Raspberry Pi.
After the initial boot, you’ll be guided through a setup process where you can configure basic settings such as language, keyboard layout, and Wi-Fi. It’s crucial to set a strong password for the default “pi” user and enable SSH for remote access.
Setting Up File Sharing with Samba
Samba is a popular tool that allows you to share files between your Raspberry Pi server and other devices on your network, regardless of their operating system. Here’s how to set up Samba for file sharing on your Raspberry Pi.
Installing Samba
First, you need to install Samba on your Raspberry Pi. Open a terminal and run the following command:
sudo apt update
sudo apt install samba samba-common-bin
This will update the package list and install Samba along with the necessary dependencies.
Configuring Samba
Next, you’ll need to configure Samba to share a specific folder. Edit the Samba configuration file using the following command:
sudo nano /etc/samba/smb.confAdd the following configuration to the end of the file, replacing `/path/to/your/shared/folder` with the actual path to the folder you want to share:
[shared]
comment = Shared Folder
path = /path/to/your/shared/folder
browsable = yes
writable = yes
guest ok = no
read only = no
create mask = 0777
directory mask = 0777
valid users = pi
This configuration creates a shared folder named “shared” that is accessible only to the “pi” user. You can adjust the settings to suit your specific needs.
Creating a Samba User
Finally, you need to create a Samba user with the same username as the user on your Raspberry Pi. Run the following command:
sudo smbpasswd -a piThis will prompt you to set a password for the Samba user. Make sure to use a strong password.
Setting up Samba involves these key steps:
- Install the Samba package.
- Modify the Samba configuration file.
- Create a Samba user and set a password.
Once Samba is configured, you can access the shared folder from other devices on your network by entering the Raspberry Pi’s IP address in the file explorer. Samba provides a seamless way to share files across different operating systems.
Setting Up Media Streaming with Plex
Plex is a powerful media server that allows you to stream your movies, TV shows, music, and photos to various devices. Here’s how to set up Plex on your Raspberry Pi home server.
Installing Plex Media Server
First, you need to download the Plex Media Server package for Linux from the Plex website. Then, install the package using the following command:
sudo dpkg -i plexmediaserver_*.debReplace `plexmediaserver_*.deb` with the actual filename of the downloaded package.
Configuring Plex
After installation, Plex Media Server will start automatically. You can access the Plex web interface by opening a web browser and navigating to `http://your_raspberry_pi_ip:32400/web`. Sign in with your Plex account or create a new one.
Adding Media Libraries
Next, you need to add your media libraries to Plex. Click the “+” button on the left sidebar and select the folder containing your movies, TV shows, music, or photos. Plex will automatically scan the folder and organize your media.

To set up Plex effectively, consider these steps:
- Download and install the Plex Media Server package.
- Access the Plex web interface through your browser.
- Add your media libraries and let Plex organize your content.
Plex offers a user-friendly interface and supports a wide range of devices, making it an excellent choice for media streaming on your Raspberry Pi home server. With Plex, you can enjoy your media library on your TVs, smartphones, and tablets with ease.
Securing Your Raspberry Pi Home Server
Security is a crucial aspect of setting up any server, including a Raspberry Pi home server. Here are some essential security measures to protect your server and your data.
Changing the Default Password
The first and most important step is to change the default password for the “pi” user. Run the following command:
sudo passwd piThis will prompt you to enter a new, strong password. Make sure to choose a password that is difficult to guess.
Enabling Firewall
A firewall is essential for protecting your server from unauthorized access. UFW (Uncomplicated Firewall) is a user-friendly firewall that is easy to configure. Install UFW using the following command:
sudo apt install ufwThen, enable the firewall and allow SSH connections:
sudo ufw enable
sudo ufw allow ssh
Keeping Your System Updated
Regularly updating your system is crucial for patching security vulnerabilities. Run the following commands to update your system:
sudo apt update
sudo apt upgrade
These commands will update the package list and install any available updates.
Securing your Raspberry Pi server involves several key practices:
- Change the default password.
- Enable and configure a firewall.
- Keep your system updated with the latest security patches.
By implementing these security measures, you can significantly reduce the risk of unauthorized access and protect your data. Security should be a top priority when setting up your Raspberry Pi home server.
| Key Point | Brief Description |
|---|---|
| 🛠️ Hardware Setup | Gather Raspberry Pi, microSD, HDD, power supply, & Ethernet. |
| 💾 OS Installation | Flash Raspberry Pi OS to the microSD card. |
| 🔗 Samba Setup | Configure Samba for file sharing across devices. |
| 🔒 Security | Change default password, enable firewall, and update the system. |
Frequently Asked Questions
▼
Raspberry Pi 4 with at least 4GB of RAM is recommended for its performance and connectivity. Newer models like Raspberry Pi 5 will also give better performance.
▼
While possible, Ethernet is highly recommended for a stable and faster connection, especially for media streaming and large file transfers.
▼
Yes, Raspberry Pi devices are designed to run continuously with low power consumption. Ensure proper cooling to prolong the lifespan of the device.
▼
You can reset the Samba password using the command `sudo smbpasswd -a username`, replacing `”username”` with your actual username. It will prompt you to set a new password.
▼
Set up port forwarding on your router to forward traffic to your Raspberry Pi’s IP address and the Plex port (32400). Use a domain name or dynamic DNS for easy access.
Conclusion
Building a Raspberry Pi home server for file sharing and media streaming is an engaging and rewarding project. By following this guide, you can create a personalized server that fits your needs, offering centralized storage, media streaming capabilities, and remote access, all while maintaining control over your data.


