Building a Chatbot with Dialogflow and Node.js: A 2025 US Developer Guide
Building a Chatbot with Dialogflow and Node.js offers US developers a comprehensive guide to creating intelligent conversational interfaces, leveraging Google’s Dialogflow and the versatility of Node.js in 2025, while focusing on future trends and best practices.
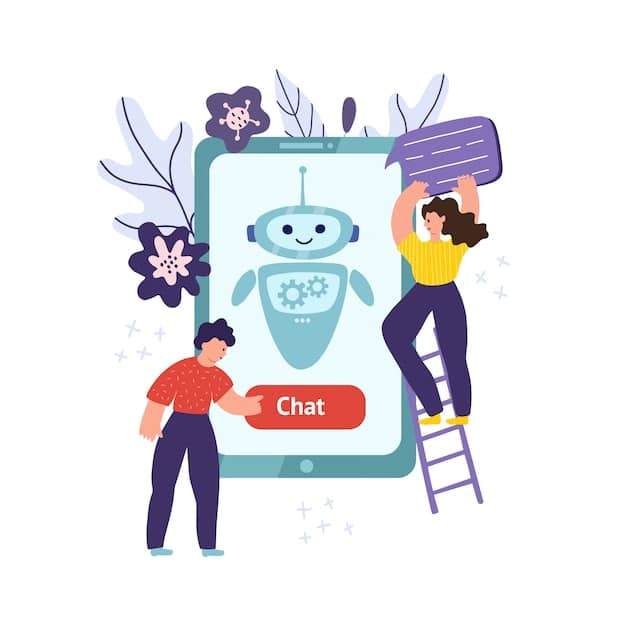
Dive into chatbot development with this comprehensive guide on building a Chatbot with Dialogflow and Node.js: A Comprehensive Guide for US Developers in 2025. Learn how to create intelligent and engaging conversational experiences for your users.
Getting Started with Dialogflow and Node.js for Chatbots
In today’s digital landscape, chatbots have become essential tools for businesses aiming to enhance customer engagement and streamline operations. For US developers in 2025, mastering the art of chatbot development using Dialogflow and Node.js opens doors to innovative solutions and career opportunities.
This section will introduce you to the basics of Dialogflow and Node.js, setting the stage for building your first chatbot.
Understanding Dialogflow
Dialogflow is a natural language understanding (NLU) platform that allows you to design and integrate conversational user interfaces into your applications. It handles the complex task of understanding user intents and entities, enabling developers to focus on creating meaningful interactions.
Node.js: The Backend Powerhouse
Node.js, on the other hand, is a JavaScript runtime environment that executes JavaScript code server-side. Its event-driven, non-blocking I/O model makes it ideal for building scalable and real-time applications, including chatbot backends.
- Setting up a Dialogflow Agent: Learn how to create a new agent in the Dialogflow console and configure its basic settings.
- Installing Node.js and NPM: Ensure you have Node.js and Node Package Manager (NPM) installed on your development machine.
- Configuring API Keys: Understand how to obtain and securely store your Dialogflow API keys for authentication.
- Setting up a Project Directory: Create a new project directory and initialize it with NPM to manage your dependencies.
By grasping these foundational concepts and completing the initial setup, you’ll be well-prepared to embark on your chatbot development journey with Dialogflow and Node.js.
Designing Conversational Flows with Dialogflow
Crafting effective conversational flows is crucial for creating engaging and user-friendly chatbots. Dialogflow provides a robust set of tools for designing these flows, ensuring that your chatbot understands user intents and responds appropriately.
This section explores the key elements of conversational flow design in Dialogflow, including intents, entities, and contexts.

Defining Intents
Intents represent the goals or actions that users want to accomplish through the chatbot. Each intent is defined by a set of training phrases, which are examples of how users might express the intent. Dialogflow uses machine learning to match user input to the appropriate intent.
Working with Entities
Entities are used to extract specific pieces of information from user input, such as dates, times, locations, or product names. Dialogflow provides a range of pre-built entities, as well as the ability to define custom entities tailored to your specific needs.
- Creating Intents: Learn how to create new intents in Dialogflow and define their corresponding training phrases.
- Defining Entities: Understand how to create and configure entities to extract relevant information from user input.
- Using Contexts: Explore how to use contexts to manage the conversation flow and maintain state across multiple turns.
- Implementing Fulfillment: Discover how to use fulfillment to connect your Dialogflow agent to your Node.js backend for custom logic and data retrieval.
By mastering these techniques, you can design sophisticated conversational flows that guide users through complex tasks and provide personalized responses. This process ensures a seamless and intuitive chatbot experience, enhancing user satisfaction and engagement.
Setting Up Your Node.js Environment
Before diving into the code, properly configuring your Node.js environment is essential. This setup involves installing necessary packages, setting up your project structure, and ensuring secure access to your Dialogflow agent.
This section walks you through the steps to set up your Node.js environment for chatbot development.
Installing Required Packages
To interact with the Dialogflow API and build your chatbot backend, you’ll need to install several Node.js packages. These packages provide functionalities such as making API requests, handling JSON data, and managing environment variables.
Configuring Authentication
Securely authenticating your Node.js application with Dialogflow is crucial to protect your agent and prevent unauthorized access. This involves obtaining a service account key from Google Cloud and configuring your application to use it.
- Installing Dialogflow Library: Use NPM to install the official Dialogflow Node.js client library.
- Setting Up Environment Variables: Store your API keys and other sensitive information in environment variables to avoid hardcoding them in your application.
- Creating a Package.json File: Initialize your project with a `package.json` file to manage your dependencies and scripts.
- Implementing Error Handling: Implement robust error handling to catch and log exceptions, ensuring your application remains stable and reliable.
By following these steps, you’ll create a secure and well-structured Node.js environment ready for building your chatbot backend. This solid foundation ensures a smooth development process and reliable performance.
Coding Your Chatbot Backend with Node.js
With your environment set up, you can now start coding the backend logic that powers your chatbot. This involves handling incoming requests from Dialogflow, processing user input, and generating appropriate responses.
This section guides you through the process of coding your chatbot backend using Node.js, focusing on handling intents and generating responses.
Handling Dialogflow Requests
Your Node.js application will receive requests from Dialogflow whenever a user interacts with your chatbot. These requests contain information about the user’s intent, entities, and context. Your application needs to parse these requests and extract the relevant data.
Generating Responses
Based on the user’s intent and extracted entities, your application needs to generate appropriate responses. These responses can be simple text messages, rich cards with images and buttons, or even complex actions that interact with external APIs.

- Creating a Webhook Endpoint: Set up a webhook endpoint in your Node.js application to receive requests from Dialogflow.
- Parsing Request Data: Use middleware to parse the JSON data in the incoming requests.
- Implementing Intent Handlers: Create separate functions to handle each intent defined in your Dialogflow agent.
- Using the Dialogflow API: Utilize the Dialogflow API to send responses back to the user and update the conversation context.
By mastering these coding techniques, you can create a dynamic and responsive chatbot backend that seamlessly integrates with Dialogflow. This integration allows your chatbot to understand user needs and provide personalized and relevant interactions.
Testing and Deploying Your Chatbot
Once you’ve built your chatbot, it’s crucial to thoroughly test it to ensure it functions correctly and provides a seamless user experience. After testing, you can deploy your chatbot to a hosting platform to make it accessible to users.
This section covers the essential steps for testing and deploying your chatbot, ensuring it’s ready for real-world use.
Testing Your Chatbot Locally
Before deploying your chatbot, it’s important to test it locally to identify and fix any bugs or issues. You can use the Dialogflow simulator or a tool like ngrok to expose your local development server to the internet.
Deploying to a Hosting Platform
Once you’re satisfied with your chatbot’s performance, you can deploy it to a hosting platform such as Heroku, Google Cloud Functions, or AWS Lambda. These platforms provide the infrastructure and tools needed to run your Node.js application in a production environment.
- Using the Dialogflow Simulator: Test your chatbot’s responses and conversational flow directly in the Dialogflow console.
- Setting Up Webhooks for Testing: Configure webhooks to send requests to your local development server for testing purposes.
- Choosing a Hosting Platform: Evaluate different hosting platforms based on factors such as cost, scalability, and ease of use.
- Configuring Deployment Settings: Set up the necessary environment variables and deployment configurations to ensure your application runs correctly on the hosting platform.
By following these steps, you can ensure your chatbot is thoroughly tested, reliably deployed, and ready to engage with users effectively. This process is vital for creating a successful and impactful chatbot solution.
Advanced Chatbot Features and Future Trends
As chatbot technology continues to evolve, it’s essential for US developers to stay informed about advanced features and emerging trends. These advancements can significantly enhance the capabilities and user experience of your chatbots.
This section explores some advanced features and future trends in chatbot development, including natural language generation, sentiment analysis, and AI-powered personalization.
Natural Language Generation (NLG)
NLG allows chatbots to generate more natural and human-like responses, improving the overall conversational experience. By using NLG techniques, you can create responses that are more engaging, informative, and personalized.
Sentiment Analysis
Sentiment analysis enables chatbots to understand the emotional tone of user input, allowing them to tailor their responses accordingly. By detecting positive, negative, or neutral sentiment, chatbots can provide more empathetic and context-aware interactions.
- Implementing NLG Techniques: Explore NLG libraries and APIs to generate more sophisticated and contextually appropriate responses.
- Integrating Sentiment Analysis: Use sentiment analysis tools to analyze user input and adjust the chatbot’s tone and behavior.
- Personalizing User Experiences: Leverage AI-powered personalization to tailor chatbot responses to individual user preferences and needs.
- Exploring Emerging Trends: Stay informed about the latest advancements in chatbot technology, such as voice-based interactions and augmented reality integrations.
By embracing these advanced features and staying ahead of emerging trends, US developers can create chatbots that are not only functional but also innovative and engaging, setting them apart in the competitive landscape of chatbot development.
| Key Aspect | Brief Description |
|---|---|
| 💡 Dialogflow Intents | Understanding and defining user goals for chatbot interactions. |
| ⚙️ Node.js Setup | Configuring the development environment for backend logic. |
| 💬 Conversational Flows | Designing seamless and intuitive user interactions. |
| 🚀 Testing & Deployment | Ensuring functionality and accessibility of the chatbot. |
Frequently Asked Questions (FAQ)
▼
Dialogflow is a Google-owned natural language understanding platform that simplifies chatbot development. It allows developers to define user intents, train the chatbot to recognize those intents, and create conversational flows without writing complex code.
▼
Node.js is a JavaScript runtime environment known for its scalability and non-blocking I/O. It’s well-suited for handling the real-time, event-driven nature of chatbots, making it efficient and performant for managing conversational interactions.
▼
It’s crucial to store API keys and other sensitive information securely. Use environment variables to keep these values separate from your code. This prevents them from being exposed in your codebase or version control system.
▼
To ensure your chatbot works correctly, use the Dialogflow simulator to test intents and responses. Additionally, set up webhooks to test the integration between Dialogflow and your Node.js backend thoroughly before deployment.
▼
Improve the user experience by implementing natural language generation for more human-like responses and incorporating sentiment analysis to understand user emotions. Personalize interactions based on user preferences and continuously gather feedback for improvements.
Conclusion
In conclusion, building a chatbot with Dialogflow and Node.js provides US developers in 2025 with the tools and techniques necessary to create intelligent and engaging conversational experiences. By mastering these technologies and staying informed about emerging trends, developers can build innovative chatbot solutions that meet the evolving needs of users.


