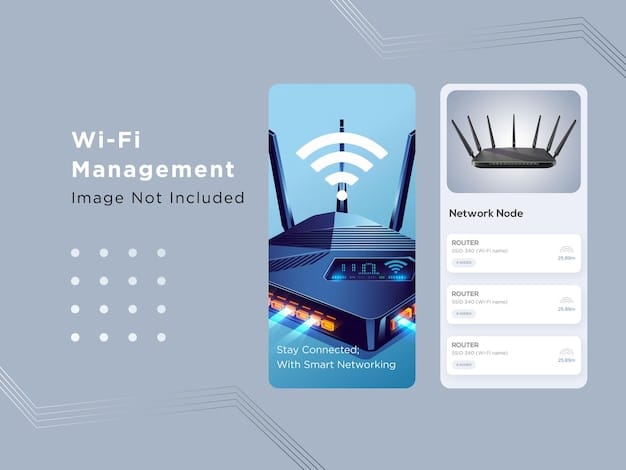
Configure Wi-Fi 7 Router for 30% Faster Speeds in 2025

Configuring your Wi-Fi 7 router in 2025 involves updating firmware, optimizing channel selection, enabling Multi-Link Operation (MLO), and ensuring your devices support Wi-Fi 7 to achieve up to 30% faster speeds.
Ready to experience lightning-fast Wi-Fi? This guide will show you how to configure Wi-Fi 7 on your router for 30% faster speeds in 2025, optimizing your network for peak performance.
Understanding Wi-Fi 7 and Its Potential
Wi-Fi 7, also known as IEEE 802.11be, is the latest generation of Wi-Fi technology. It promises significant improvements over Wi-Fi 6 and 6E, offering faster speeds, lower latency, and increased network capacity. Before diving into configuration, let’s understand its capabilities.
Key Features of Wi-Fi 7
Wi-Fi 7 introduces several new features designed to enhance wireless performance. These include:
- 320 MHz Channel Bandwidth: Wi-Fi 7 supports wider channels, doubling the bandwidth compared to Wi-Fi 6E, allowing for faster data transfer rates.
- 4096-QAM: This modulation technique increases the amount of data transmitted per symbol, boosting data rates.
- Multi-Link Operation (MLO): MLO enables devices to use multiple frequency bands simultaneously, improving reliability and reducing latency.
These features collectively contribute to the superior performance of Wi-Fi 7, making it ideal for bandwidth-intensive applications like 4K/8K video streaming, online gaming, and augmented reality.
Wi-Fi 7 represents a substantial leap in wireless technology, offering increased speed and lower latency. Understanding these advancements is crucial for optimal configuration.
Checking Your Router’s Wi-Fi 7 Compatibility
Before you begin configuring your router, it’s essential to ensure it actually supports Wi-Fi 7. Not all routers are created equal, and older models won’t have the necessary hardware and firmware.
How to Verify Compatibility
Here’s how you can check if your router is Wi-Fi 7 compatible:
- Check the Router’s Model Number: Look for the model number on the router itself or in the packaging.
- Visit the Manufacturer’s Website: Search for your router model on the manufacturer’s website to see its specifications.
- Look for Wi-Fi 7 Certification: Ensure the router is certified for Wi-Fi 7 (IEEE 802.11be).
If your router is not Wi-Fi 7 compatible, you’ll need to upgrade to a newer model to take advantage of the technology’s benefits. Manufacturers like TP-Link, Netgear, and ASUS have already released Wi-Fi 7 routers.
Verifying compatibility is a critical first step in configuring your Wi-Fi 7 router. Without it, any further configuration efforts will be futile.

Firmware Updates: Preparing Your Router
Once you’ve confirmed your router is Wi-Fi 7 compatible, the next step is to update its firmware. Firmware updates often include performance improvements, bug fixes, and support for new features, making them essential for optimal performance.
Updating Your Router’s Firmware
Follow these steps to update your router’s firmware:
- Access the Router’s Web Interface: Open a web browser and enter your router’s IP address (usually 192.168.1.1 or 192.168.0.1) in the address bar.
- Log In: Enter your username and password. If you haven’t changed them, check the router’s manual for the default credentials.
- Navigate to the Firmware Update Section: Look for a section labeled “Firmware Update,” “Router Update,” or something similar.
Most routers offer an automatic update option, allowing the router to download and install the latest firmware automatically. Some models may require you to download the firmware file from the manufacturer’s website and upload it manually.
Keeping your router’s firmware up to date is crucial for maintaining optimal performance and security. It ensures you have the latest features and bug fixes.
Configuring the Wireless Settings
After updating the firmware, it’s time to configure the wireless settings on your Wi-Fi 7 router. This involves selecting the correct channel, setting the channel width, and configuring security settings.
Optimizing Channel Selection
Choosing the right wireless channel can significantly impact your network’s performance. Here’s how to optimize it:
- Use a Wi-Fi Analyzer Tool: Download a Wi-Fi analyzer app on your smartphone or computer to scan for nearby networks and their channels.
- Choose a Less Crowded Channel: Select a channel with the least interference from other networks to minimize congestion.
- Consider 20/40/80/160/320 MHz Channel Width: Wi-Fi 7 supports wider channels (up to 320 MHz), which can provide faster speeds. However, wider channels are more susceptible to interference.
Experimenting with different channels and channel widths can help you find the optimal configuration for your environment. The goal is to maximize speed while minimizing interference.
Selecting the right channel and channel width is a crucial step in optimizing your Wi-Fi 7 router’s performance. A less congested channel ensures a more stable and faster connection.
Enabling Multi-Link Operation (MLO)
One of the standout features of Wi-Fi 7 is Multi-Link Operation (MLO). This technology allows devices to use multiple frequency bands simultaneously, improving reliability and reducing latency.
How to Enable MLO
To enable MLO on your Wi-Fi 7 router:
- Access the Router’s Web Interface: Log in to your router’s web interface as described earlier.
- Navigate to the Wireless Settings: Find the section where you configure the wireless settings.
- Enable MLO: Look for an option to enable Multi-Link Operation (MLO) and activate it.
Keep in mind that both your router and client devices must support MLO for this feature to work effectively. Check the specifications of your devices to ensure they are compatible.
Enabling MLO can significantly improve your Wi-Fi 7 network’s performance by reducing latency and increasing reliability. It is particularly beneficial in environments with high network congestion.
Security Considerations and WPA3
Securing your Wi-Fi network is paramount. Wi-Fi 7 supports the latest security standards, including WPA3, which offers improved encryption and authentication compared to WPA2.
Configuring WPA3 Security
To configure WPA3 security on your Wi-Fi 7 router:
- Access the Router’s Web Interface: Log in to your router’s web interface.
- Navigate to the Wireless Security Settings: Find the section where you configure the wireless security settings.
- Select WPA3: Choose WPA3 as the security protocol. Some routers may offer a WPA3/WPA2 mixed mode for compatibility with older devices.
When using WPA3, make sure to use a strong, unique password to protect your network from unauthorized access. Avoid using common words or phrases that can be easily guessed.
Using WPA3 security is crucial for protecting your Wi-Fi 7 network from cyber threats. It offers enhanced encryption and authentication, ensuring a more secure wireless experience.
Testing and Optimizing Your Wi-Fi 7 Network
After configuring your Wi-Fi 7 router, it’s important to test and optimize your network to ensure you’re getting the best possible performance. This involves running speed tests, checking signal strength, and adjusting settings as needed.
Testing Network Speed and Signal Strength
Here’s how to test and optimize your Wi-Fi 7 network:
- Run Speed Tests: Use online speed test tools to measure your network’s upload and download speeds. Compare the results with your internet service provider’s advertised speeds.
- Check Signal Strength: Use a Wi-Fi analyzer app to check the signal strength in different areas of your home or office.
- Adjust Router Placement: Experiment with different router placements to improve signal strength and coverage.
If you’re experiencing slow speeds or weak signal strength, consider adjusting the router’s antenna orientation, moving it to a more central location, or adding a Wi-Fi extender to boost coverage. Regularly monitoring and adjusting your network settings can help you maintain optimal performance over time.
Testing and optimizing your Wi-Fi 7 network is an ongoing process. Regularly monitoring performance and adjusting settings ensures you’re always getting the best possible experience.
| Key Point | Brief Description |
|---|---|
| 🚀 Wi-Fi 7 Features | Faster speeds, lower latency, and increased capacity. |
| ✔️ Compatibility Check | Verify router supports Wi-Fi 7 before configuring. |
| ⬆️ Firmware Update | Update router firmware for optimal performance. |
| 🔒 Security | Configure WPA3 for enhanced security. |
FAQ
▼
Wi-Fi 7 is the latest generation of wireless technology, offering faster speeds, lower latency, and increased network capacity compared to previous standards.
▼
Check the router’s model number on the device or packaging, and visit the manufacturer’s website to confirm its specifications and Wi-Fi 7 certification.
▼
MLO enables devices to use multiple frequency bands simultaneously. This improves reliability and reduces latency, resulting in better overall network performance.
▼
Firmware updates include performance improvements, bug fixes, and support for new features. Regularly updating ensures optimal performance and security for your router.
▼
Optimize by selecting less crowded channels, enabling MLO, using WPA3 security, and regularly testing network speed and signal strength to adjust settings accordingly.
Conclusion
Configuring your Wi-Fi 7 router for optimal performance involves several key steps, from verifying compatibility and updating firmware to optimizing wireless settings and enabling Multi-Link Operation. By following these guidelines, you can unlock the full potential of Wi-Fi 7 and enjoy faster speeds, lower latency, and improved network reliability in 2025.


