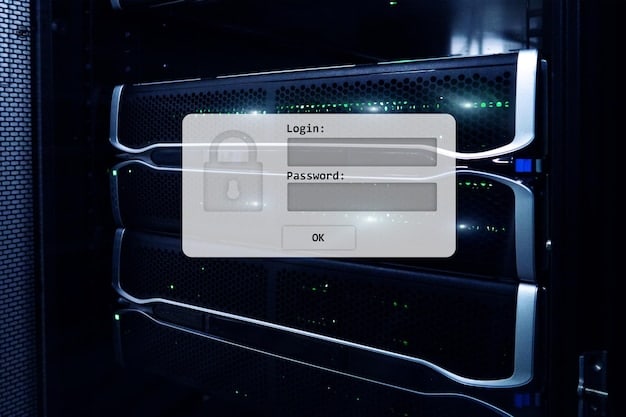
How to Encrypt Hard Drive with BitLocker on Windows 10/11

Encrypting your hard drive with BitLocker on Windows 10 or 11 is a robust way to protect your data by rendering it unreadable to unauthorized users, ensuring that your sensitive information remains confidential even if your device is lost or stolen.
Want to keep your personal or business files safe? Learn how to encrypt your hard drive with BitLocker on Windows 10/11, a built-in security feature that protects your data from unauthorized access.
Understanding BitLocker Drive Encryption
BitLocker Drive Encryption is a full disk encryption feature included with Microsoft Windows operating systems starting with Windows Vista. It is designed to protect data by providing encryption for entire volumes. Let’s delve deeper into what BitLocker is and why you should consider using it.
What is BitLocker?
BitLocker is a data protection feature that integrates with the operating system to address the threats of data theft or exposure from lost, stolen, or inappropriately decommissioned computers. It encrypts all user files and system files on the Windows operating system volume and ensures that these files are not accessible when the computer is not in use.
Why Use BitLocker?
There are several compelling reasons to use BitLocker. Here are a few key benefits:
- Data Protection: BitLocker provides a strong layer of security, making it extremely difficult for unauthorized individuals to access your data.
- Compliance: Many industries and regulations require data encryption. Using BitLocker can help you meet these compliance requirements.
- Peace of Mind: Knowing that your data is encrypted can provide significant peace of mind, especially if you frequently travel with your laptop or handle sensitive information.
- Easy to Use: BitLocker is integrated directly into Windows, making it relatively easy to set up and manage.
In summary, BitLocker is a valuable tool for anyone who wants to protect their data from unauthorized access. Whether you’re a business professional handling sensitive client information or a home user protecting personal files, BitLocker can provide the security you need.
Checking BitLocker Requirements and System Compatibility
Before you begin encrypting your hard drive with BitLocker, it’s essential to ensure that your system meets the necessary requirements and is compatible with the feature. This will help avoid any potential issues during the encryption process.
Operating System Requirements
BitLocker is available in specific editions of Windows. Here’s what you need:
- Windows 10: BitLocker is available in Windows 10 Pro, Enterprise, and Education editions.
- Windows 11: Similarly, BitLocker is included in Windows 11 Pro, Enterprise, and Education editions.
If you are using Windows 10 or 11 Home edition, you will need to upgrade to a Pro, Enterprise, or Education edition to use BitLocker.
TPM (Trusted Platform Module) Requirement
A TPM chip is a hardware component that provides enhanced security features. While BitLocker works best with a TPM, it is possible to use it without one.
- With TPM: BitLocker uses the TPM to securely store the encryption keys. This is the recommended configuration for maximum security.
- Without TPM: If your computer doesn’t have a TPM, you can still use BitLocker, but you’ll need to use a startup key on a USB drive or a password. This method is less secure but still provides encryption.
Checking TPM Status
To check if your computer has a TPM and whether it’s enabled, follow these steps:
- Press `Windows Key + R` to open the Run dialog.
- Type `tpm.msc` and press Enter.
- The TPM Management window will open. If a TPM is present and enabled, you’ll see its status. If not, you’ll receive a message indicating that a compatible TPM cannot be found.
Ensuring that your system meets these requirements is a crucial first step. Knowing whether you have a compatible operating system and a TPM will guide you in the subsequent steps of enabling BitLocker.
Enabling BitLocker on Your Hard Drive
Now that you’ve confirmed that your system meets the requirements, the next step is to enable BitLocker on your hard drive. This process will encrypt your drive, protecting your data from unauthorized access.
Step-by-Step Guide to Enabling BitLocker
Here’s a detailed guide to enabling BitLocker on Windows 10/11:
- Open Control Panel:
- Click on the Start button.
- Type “Control Panel” and select it from the search results.
- Navigate to BitLocker Drive Encryption:
- In Control Panel, click on “System and Security.”
- Click on “BitLocker Drive Encryption.”
- Turn On BitLocker:
- Locate the drive you want to encrypt (usually the C: drive, which is your operating system drive).
- Click on “Turn on BitLocker” next to the drive.
- Choose How to Back Up Your Recovery Key:
- You’ll be prompted to choose how you want to back up your recovery key. This key is essential for unlocking your drive if you forget your password or encounter issues.
- Options include:
- Save to your Microsoft account: The recovery key will be stored in your Microsoft account.
- Save to a file: You can save the recovery key as a text file on a USB drive or another safe location.
- Print the recovery key: You can print the recovery key and store it in a secure place.
- Choose the option that best suits your needs and follow the prompts to save or print the key.
- Choose Whether to Encrypt Used Disk Space or the Entire Drive:
- You’ll be asked whether to encrypt only the used disk space or the entire drive.
- If you’re encrypting a new drive, choose “Encrypt entire drive.”
- If the drive is already in use, you can choose “Encrypt used disk space only” for a faster process.
- Choose Encryption Mode:
- Select either “New encryption mode” or “Compatible mode.”
- “New encryption mode” is best for fixed drives on your device and is generally the recommended option for Windows 10 and 11.
- “Compatible mode” is better for drives that may be moved between devices running different versions of Windows.
- Run BitLocker System Check:
- Check the “Run BitLocker system check” box and click “Continue.” This ensures that BitLocker can read the recovery information and encryption keys before encrypting the drive.
- Restart Your Computer:
- You’ll be prompted to restart your computer to begin the encryption process.
- Click “Restart Now” to reboot your system.
- Encryption Process:
- After the restart, BitLocker will begin encrypting your hard drive in the background.
- The duration of the encryption process depends on the size of your drive and the amount of data.
- You can continue using your computer while the encryption is in progress, but performance may be slightly affected.
By following these steps, you can successfully enable BitLocker on your hard drive and protect your data.
Managing BitLocker: Changing Password and Backup Recovery Key
After enabling BitLocker, it’s important to know how to manage it effectively. This includes changing your password and ensuring that your recovery key is backed up securely. Regular maintenance ensures that your data remains protected.
Changing Your BitLocker Password
Changing your BitLocker password regularly is a good security practice. Here’s how to do it:
- Open Control Panel:
- Click on the Start button.
- Type “Control Panel” and select it from the search results.
- Navigate to BitLocker Drive Encryption:
- In Control Panel, click on “System and Security.”
- Click on “BitLocker Drive Encryption.”
- Change Password:
- Locate the drive for which you want to change the password.
- Click on “Change password.”
- Follow Prompts:
- Enter your current password.
- Enter your new password and confirm it.
- Click “Finish” to save the new password.
Backing Up Your Recovery Key
It is crucial to ensure that your recovery key is backed up in case you forget your password or encounter issues with BitLocker. Here’s how to back it up:
- Open Control Panel:
- Click on the Start button.
- Type “Control Panel” and select it from the search results.
- Navigate to BitLocker Drive Encryption:
- In Control Panel, click on “System and Security.”
- Click on “BitLocker Drive Encryption.”
- Back Up Recovery Key:
- Locate the drive for which you want to back up the recovery key.
- Click on “Back up your recovery key.”
- Choose Backup Method:
- Select one of the following options:
- Save to your Microsoft account: The recovery key will be stored in your Microsoft account.
- Save to a file: You can save the recovery key as a text file on a USB drive or another safe location.
- Print the recovery key: You can print the recovery key and store it in a secure place.
- Follow the prompts to complete the backup process.
- Select one of the following options:
Suspending and Resuming BitLocker Protection
There might be situations where you need to temporarily disable BitLocker, such as when updating your system BIOS or performing hardware maintenance. Here’s how you can suspend and resume BitLocker protection:
- Suspending BitLocker:
- In the BitLocker Drive Encryption control panel, click “Suspend Protection.”
- A warning message will appear confirming that your data will not be protected while BitLocker is suspended. Click “Yes” to proceed.
- Resuming BitLocker:
- After completing your maintenance, return to the BitLocker Drive Encryption control panel.
- Click “Resume Protection” to re-enable BitLocker and protect your data again.
By managing BitLocker effectively, you can ensure that your data remains secure and accessible whenever you need it.
Troubleshooting Common BitLocker Issues
While BitLocker is a powerful tool for data protection, you might encounter some issues during its setup or usage. Here are some common problems and their solutions.
Issue: BitLocker Asks for Recovery Key Every Time I Start My Computer
This issue can be frustrating, but it often has a simple solution.
- Cause: This can occur if there are changes to the system hardware or firmware, such as a BIOS update.
- Solution:
- Suspend and Resume BitLocker: Suspend BitLocker protection, restart your computer, and then resume BitLocker protection. This can reset the system’s understanding of the hardware configuration.
- Update BIOS/UEFI: Ensure your system’s BIOS or UEFI is up to date. Check the manufacturer’s website for the latest version.
- Disable and Re-enable TPM: In the BIOS settings, try disabling and then re-enabling the TPM. This can help re-establish the trust relationship between the TPM and BitLocker.
Issue: BitLocker Encryption Process is Stuck or Slow
A slow or stuck encryption process can be concerning. Here’s how to address it:
- Cause: This can be due to high disk usage, fragmented files, or system errors.
- Solution:
- Defragment Your Hard Drive: Run the Disk Defragmenter tool to optimize your drive.
- Check Disk for Errors: Use the Check Disk utility (chkdsk) to scan for and fix file system errors.
- Close Unnecessary Programs: Close any applications or processes that are using a lot of disk or CPU resources.
- Ensure Adequate Disk Space: Make sure you have sufficient free space on your hard drive for the encryption process to complete successfully.
Issue: Forgetting Your BitLocker Password
Forgetting your BitLocker password can be a serious problem; however, having a recovery key ensures that you can still access your data.
- Solution:
- Use Your Recovery Key: When prompted for the password, you should see an option to enter the recovery key instead. Enter the 48-digit recovery key that you saved when you enabled BitLocker.
Issue: BitLocker is Not Available on My Windows Edition
As mentioned earlier, BitLocker is only available on specific editions of Windows.
- Solution:
- Upgrade Your Windows Edition: If you are using Windows Home edition, you will need to upgrade to Windows Pro, Enterprise, or Education edition to use BitLocker. You can purchase an upgrade through the Microsoft Store.
By understanding these common issues and their solutions, you can troubleshoot problems effectively and ensure that your data remains protected by BitLocker.
Best Practices for BitLocker Security
To maximize the security benefits of BitLocker, it’s essential to follow some best practices. These guidelines will help ensure that your data remains protected against unauthorized access and potential threats.
- Regularly Back Up Your Recovery Key:
- Multiple Backups: Store your recovery key in multiple secure locations. This could include saving it to your Microsoft account, saving it as a file on a USB drive, and printing a physical copy.
- Secure Storage: Ensure that any physical copies of your recovery key are stored in a secure location, away from your computer.
- Use Strong Passwords:
- Complex Passwords: Create strong, complex passwords that are difficult to guess. Use a combination of uppercase and lowercase letters, numbers, and symbols.
- Password Manager: Consider using a password manager to securely store and manage your passwords.
- Regular Password Changes: Change your BitLocker password periodically to maintain a high level of security.
- Keep Your System Updated:
- Windows Updates: Enable automatic Windows Updates to ensure that your system has the latest security patches and updates.
- Driver Updates: Keep your device drivers updated, including graphics drivers, network drivers, and storage drivers.
- Secure Your BIOS/UEFI Settings:
- BIOS Password: Set a password for your BIOS/UEFI settings to prevent unauthorized changes to your system configuration.
- Boot Order: Configure the boot order to prevent booting from external devices without proper authorization.
- Be Cautious with Removable Media:
- Encryption: Encrypt any removable media, such as USB drives or external hard drives, that contain sensitive data.
- Safe Handling: Handle removable media with care to prevent loss or theft.
Implementing these best practices will significantly enhance the security of your data and protect it from various threats. By taking these measures, you can ensure that BitLocker provides the robust protection it is designed for.
| Key Point | Brief Description |
|---|---|
| 🔑 What is BitLocker? | Full drive encryption tool in Windows to protect your data. |
| ✅ Requirements | Pro, Enterprise, or Education editions of Windows 10/11; TPM chip recommended. |
| 💾 Backing Up Recovery Key | Save to Microsoft account, file, or print it for safekeeping. |
| 🔒 Best Practices | Use strong passwords, keep the system updated, and secure BIOS settings. |
Frequently Asked Questions
▼
BitLocker is a full drive encryption feature in Windows that protects your data from unauthorized access. It’s essential for securing sensitive information on your laptop or desktop.
▼
BitLocker is available on Windows 10 and 11 Pro, Enterprise, and Education editions. The Home edition does not support BitLocker. Consider upgrading if you’re on Windows Home.
▼
TPM (Trusted Platform Module) is a hardware component that enhances security. While recommended, it’s not strictly required. You can use a USB drive for encryption keys if TPM isn’t available.
▼
You can back up your recovery key to your Microsoft account, save it as a file, or print it. Ensure it’s stored securely as it’s needed if you forget your password.
▼
This may happen after hardware changes. Suspend and resume BitLocker, update your BIOS, or disable/re-enable TPM in BIOS settings to resolve this issue.
Conclusion
Encrypting your hard drive with BitLocker on Windows 10/11 is a crucial step in safeguarding your data from unauthorized access. By following the steps outlined in this guide and adhering to best security practices, you can ensure that your sensitive information remains protected, providing peace of mind in an increasingly digital world.


